easy winter squash sauce, two ways

Yes, more squash. I like to think of my current fixation on it as dedication to efficiency, not lack of imagination. It’s not even in my top-5 favourite vegetables. But cutting a squash in half and sticking it in the oven for an hour to get 8-10 servings of veg is a pretty good prep-to-payoff ratio. I can easily kill an hour processing vegetables for a dinner with friends. Bypassing some of that nonsense is kinder to my hands.  It’s also 76 cents a pound right now, and moving is expensive, folks. So, winning all around.

This recipe only requires cutting your squash in half or quarters. Most recipes require quite a bit more prep, however, and that can be a daunting prospect. Peeling and chopping squash objectively sucks, I highly recommend you just don’t do it. But how else am I supposed to get to that delicious squashy goodness, you may ask. Well, here you go:

  1. Buy it pre-chopped and peeled, either frozen or fresh, if you can afford to.
  2. Pick a softer, hollower squash that doesn’t require peeling, like Delicata. Acorn is fine but unwieldy and getting it out of the skin, even when roasted whole, is obnoxious.
  3. Invite someone who is trying to impress you over for dinner and get them to do it.
  4. Pick a squash whose narrowest part is smaller than your biggest knife. Never make a cut longer than the length of your knife unless you know what you are doing, you have recently sharpened your knife, and you are extremely confident in your grip strength as it pertains to deadly weapons.
  5. Smashing a squash against the sidewalk is a totally legit way to crack it open. Just rinse it off after. The sidewalk, and the squash.
  6. Use a sharp peeler that pulls vertically, not horizontally. You want to use your larger muscle groups in cooking as much as possible to avoid strain.
  7. If you can afford it, use tinned pureed pumpkin or butternut squash. It’s perfectly fine for these recipes.
  8. Roast your squash cut side down in a couple inches of water in a deep baking tray, or cut side up and rubbed in a bit of oil. Either way, generously line your pan with foil so you don’t have to wash it. I usually do a 400 degree oven and start checking for doneness at the 45 minute mark. You want to bake it until your butter knife slides through the thickest part of the squash like… butter. Let it cool for a bit before scooping the squash out of the skin so you don’t burn your sweet self.

Keeping with the theme of flavour groupings, these two recipes start with a roasted squash that you puree into a sauce, but they taste wildly different. They both have miso, and a wine of sorts. But while the pasta sauce is creamy, cheesy and delicately herbed, the soba noodle sauce is gingery-sweet with mirin and a lot more miso to balance the heat. One baked butternut squash is enough for both sauces, so while your blender is out, go ahead and make both. Freeze one, or use them both over different meals in the same week.
squash

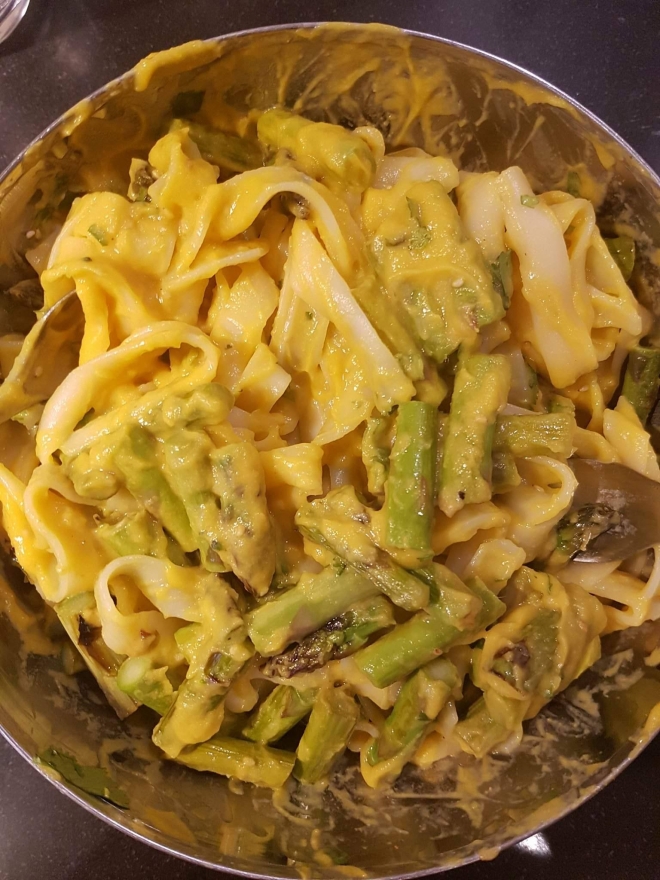
Miso Ginger Butternut sauce with broad rice noodles and grilled asparagus. It is way tastier than it looks, I promise.

Butternut Alfredo Sauce
Inspired by Isa Does It, by Isa Chandra Moskowitz
1/2 c cashews, soaked for at least 2 hours (or 2 tbsp cashew butter (preferably raw) blended into 1/3 c water)
1 1/2 c strong vegetable broth (I like a leek-heavy one for this)
1 1/2 c roasted winter squash
2 tbsp white miso
2 tbsp nutritional yeast
1 smallish clove of garlic, pressed
1/2 tsp dried sage and/or thyme and/or tarragon
White pepper, if you have it. If not, use whatever. If you’re feeling French, grate in the tiniest smidge of fresh nutmeg.
1/4 c dry white wine (I like a dry, oaky chardonnay for this)

Blend the cashews/ cashew butter into the broth. If your blender sucks, start with less broth and add slowly. It is easier to blend smoothly into the least amount of liquid possible. Scrape down the sides as needed. Don’t stress, you got this. Add all the other ingredients and blend away until perfectly smooth or you get tired of fighting with your blender, whichever comes first. Ta da. No need to cook really, if you’re serving this with pasta or gnocchi just toss it back into the pot after you’ve drained it and stir in the sauce. The residual heat will be enough to warm the sauce for serving. Probably eat a green vegetable, while you’re at it. A side of garlicky sauteed chard is nice.

Miso/ Ginger Butternut Sauce

2 c roasted winter squash
1/3-1/2 c white miso
1/4 c good, strong mirin
1/4 c olive oil
3 tbsp toasted sesame oil
1.5 tbps grated fresh ginger
1 clove pressed garlic
Optional: if you’re digging the dragon sauce vibes here and want a typical dragon sauce with a squash base, add a tbsp each tahini and maple syrup, and 3 tbsp nutritional yeast. Should be about perfect.

Blend everything in the blender. It should be easy peasy. Toss with hot soba or rice noodles. I served it with grilled asparagus, sesame seeds, and some sliced cilantro and scallion. But whatever, it can carry it’s own weight on the plate. Steamed bok choy in lemon and tamari would be good, too.

soup weather

Autumn came suddenly the day of our move. It had been 25+ degrees of sweltering, humid July weather up until then. A violent storm took out the last of summer and it has been scarves and boots weather since- perfect for nesting.

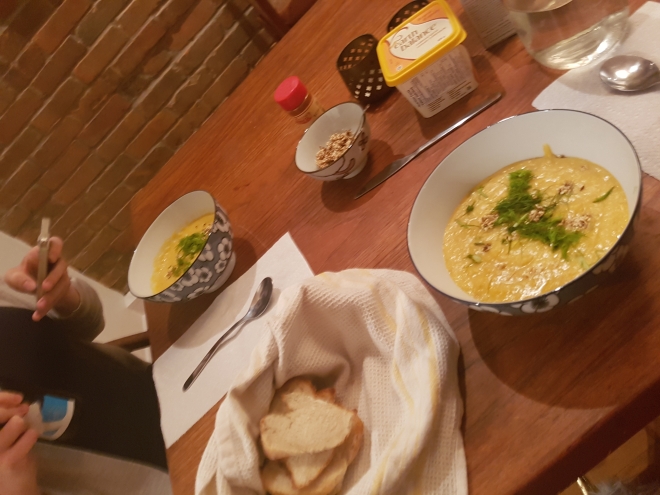
My new roomie comes with a 9-month-old sourdough starter, and nothing inspires soup like some good, fresh bread to go with it. So when she suggested we try this butternut squash and fennel soup with miso (from Kale & Caramel), it was an easy sell. I had a hard time imagining how fennel and miso would taste together. They are two key ingredients I work with all the time, but in very different cuisines. Fennel is for salads and crunch, subtle sweetness and green, herbaceous notes that cut through salty, fatty, smoky things. Miso is for adding a tang of fermentation and umami depth to more neutral grains and beans, complementing earthy mushrooms and offsetting sticky-sweet glazes. They both have such strong personalities that they make unlikely bedfellows.

But it was her turn to cook, and I haven’t met a squash I didn’t like. So we gave it a whirl. Together, I discovered, miso and fennel offer a unique balance of flavours that make the sometimes unctuousness of butternut squash sing. Instead of cloying, as squash soups with sweeter flavours from apple and cinnamon sometimes are, this one is purely savoury. Try it on your squash-hating friends, you can blame me if they don’t like it.

20171002_212018

Fennel Butternut Squash Miso Soup With Toasted Seeds
Serves 3-4
from Lily Diamond’s Kale & Caramel

For the soup:
3 cups roasted or steamed butternut squash (canned is also fine)
1 medium onion, sliced
1 medium fennel bulb, washed and sliced, plus
¼ cup minced fennel fronds for garnish
¼ cup olive oil
1⁄4 teaspoon sea salt
1⁄4 teaspoon cayenne pepper, plus more for garnish
1⁄2 teaspoon ground coriander
1 (13.5-ounce) can full-fat coconut milk
1 cup vegetable broth
1⁄4 cup plus 2 tablespoons miso paste

For the seeds:
1 teaspoon raw virgin coconut oil
2 tablespoons raw sesame seeds
1 tablespoon fennel seeds, lightly crushed with a mortar and pestle or spice grinder
Flaky sea salt
Coconut milk or plain yogurt, for drizzling
MAKE THE SOUP
Puree the squash in a food processor or blender until completely smooth. Set aside.

Place the onion and sliced fennel in a stockpot or large saucepan with the oil, salt,cayenne, and coriander. Sauté over medium-high heat for 5 minutes, stirring frequently,then reduce the heat to low. Cook, stirring occasionally, until the onion and fennel soften and begin to brown, 10 to 15 minutes.

Add the squash and cook for another 5 minutes.Then add the coconut milk and broth and stir to incorporate fully, increasing the heat to medium. Put on the lid and cook for another 5 minutes, then scoop 1 cup of the liquid (not the onion and fennel) into a bowl.Whisk in the miso, until most clumps are gone. Return the mixture to the pot, reduce the heat to low, and stir to combine. Replace the lid and cook for another 5 minutes.

Transfer to a blender and blend at medium speed until the soup is mostly pureed, with some texture left. Return the soup to the pot and cover.

MAKE THE TOASTED SEEDS
Place the coconut oil in a small frying pan and melt over medium heat. Swirl to coat the pan. Add the sesame and fennel seeds and a sprinkle of salt. Use a spatula to coat the seeds with the oil and let them toast for 2 to 3 minutes, until fragrant. If they start to brown too quickly, remove from the heat. Transfer to a small bowl.

SERVE THE SOUP
Top the soup with a drizzle of coconut milk, the minced fennel fronds, a sprinkle of toasted sesame seeds, and cayenne and salt to taste.

hello.

I have sometimes used this place for cataloguing recipes, mostly for the purpose of sharing them with friends. I am going to be doing a bit more of that, but also just sharing things I eat and interesting food stuff generally. It’s Thanksgiving month here in Canada, which is a pretty excellent holiday for food. There will be a bit of that, a bit of everyday life in Montreal, and then some vegan-in-Amsterdam adventures later in the month.

I just moved to a new apartment with a new roommate in the Plateau area of Montreal. It’s a gorgeous, century-old home, and accidental-landlord/ astrophysicist who lives downstairs used to run it as a B&B. Like, a real one. So, the kitchen is quite serviceable for an older building.

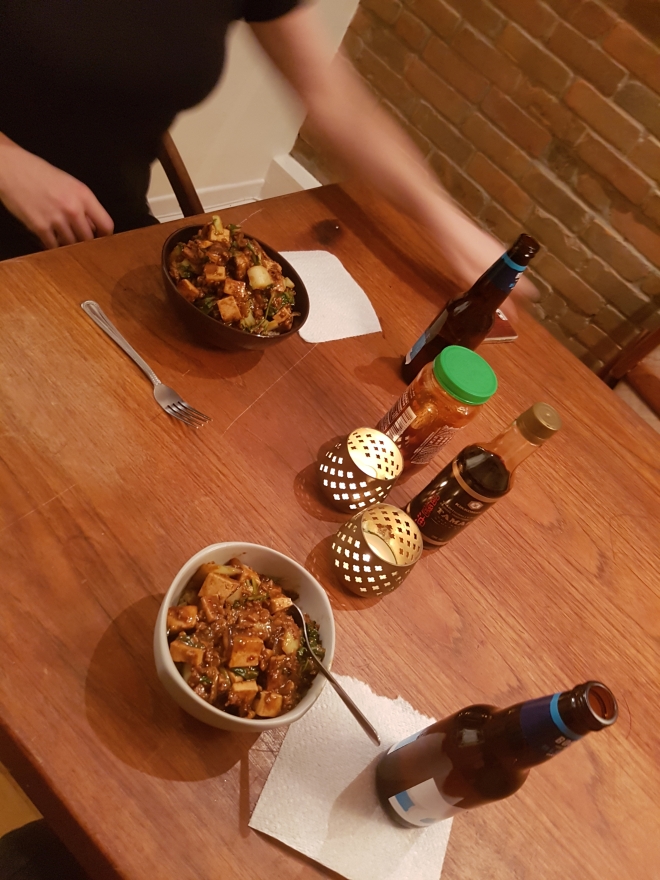
I am still figuring out where the best fruiteries and boulangeries are, but I found a solid grocer nearby who has an excellent selection of vegan staples. We went for our first shop on Sunday and picked up ingredients for Mapo Tofu. This was our first proper meal and we cooked while unpacking the kitchen. By the time we sat down to eat we were wiped. Moving is hard, folks.

20171001_200211.jpg

Mapo Tofu

This recipe was introduced to me via a scrawled note in an ancient folder that I discovered at work. I have no idea if it is anything like other Mapo Tofu but it’s delicious either way. At its most basic level, Mapo Tofu is firm tofu and ground round/ veggie crumbles in a savoury sauce with the fermented tang of douchi and garlic chili paste. If you don’t have douchi, try the darkest miso you can find. Serve it over nice fat rice noodles or a short grain rice. This version includes veggies, because I care about your micronutrient intake. ❤

Serves 6. Prep time: 30 mins

1 block extra firm tofu, chopped into 1-inch cubes
1 package of veggie ground round
1 big yellow onion, chopped
1 small pack of mushrooms, sliced
1 medium head of bok choy, sliced in 1-inch strips
4-6 cloves of garlic, minced
1 tbsp fresh ginger, shredded
neutral oil for cooking

For the sauce:
2-3 tbsp douchi, soaked 20 mins, rinsed, and chopped
2 tbsp toasted sesame oil
2 tbsp rice wine
2 tbsp soy sauce
1 tbsp garlic chili paste
1 tbsp cornstarch dissolved in 1 cup of water

  • Heat some oil in a large skillet over medium-high heat. Add the onion and cook til just starting to turn golden.
  • Add the mushrooms and cook a few more minutes until they are a bit drier and starting to sear.
  • Add all the remaining vegetables, mixing thoroughly. Cook til the bok choy is just starting to wilt.
  • Whisk together the sauce, adding it all at once. Cook for about 1 minute, until hot and bubbly. Add more water if it’s not saucy enough (more sauce= more better).
  • Serve over hot rice or noodles with extra chili sauce on the side. Bon appetit!


Roasted Tomato and Beet Bisque

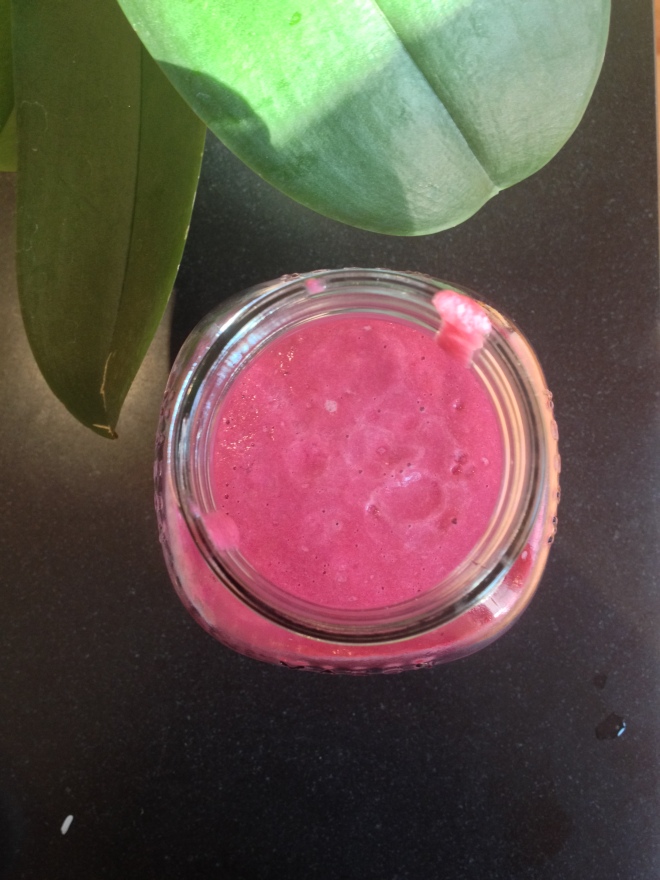
Check out that gorgeous pink, creamy soup!

Check out that gorgeous pink, creamy soup!

It’s starting to feel like Autumn here in Montreal and the end of summer harvest is in full swing. Tomatoes are selling off at the market for a fraction of what they normally cost, and bright bushels of beets are stacked row on row in front of fruiteries at every corner, tempting passersby with thoughts of warm borchts and savoury-sweet grilled beet salads. This recipe brings together the two in an unusual pairing that I am sure you will find as addictive as we do. It might seem odd, and I get it- beets and tomatoes, why would you do that? But trust me when I tell you, this recipe is so easy, healthy, cheap, and look at that colour! You are going to fall in love.

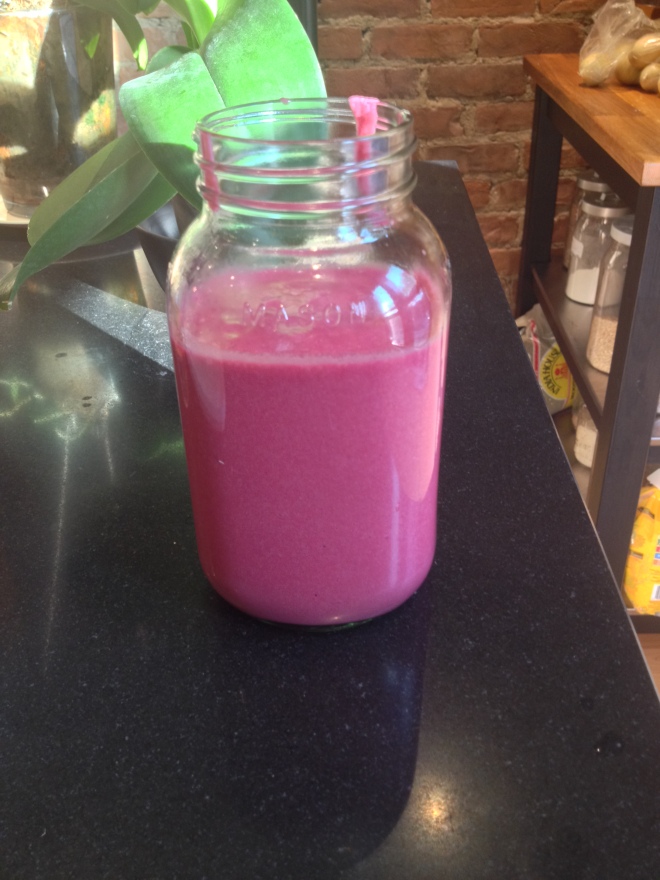
Bisque is traditionally thickened with a starch, such as rice or potatoes, before being strained and enriched with cream. In this case, I used raw sunflower seeds. They add the perfect creaminess and their subtle flavour is ideal for light vegetable purees such as this. We can thank the sunflower seeds for the pink colour, too! You could omit them, or substitute a starch as with a traditional bisque, or any unsweetened, neutral flavour plant cream will do. You can change the colour of the bisque to a lovely golden orange by using golden beets and tomatoes instead. This recipe requires no pot, just a slow roast in the oven and a trip through the blender. Go ahead and bake yourself some bread or pumpkin muffins while the oven is hot and the veggies are roasting. It’s that time of year!

It's also good straight out of the jar, just saying.

It’s also good straight out of the jar, just saying.

Roasted Tomato and Beet Bisque

1 medium yellow onion, peeled and sliced
3 large, flavourful tomatoes, cored
2 medium beets, peeled and sliced fine
2 small cloves of garlic, smashed and peeled
1/2 cup sunflower seeds, raw
4 cups good vegetable stock, home made leek stock if possible
1 tbsp neutral oil
1 tsp salt
Pink or white pepper, or plain black pepper if that’s all you have

1) Preheat the oven to 375 degrees. Line a large baking tray with a sheet of tinfoil

2) Arrange vegetables in the foil, drizzle with the oil and sprinkle with half the salt. Cover with another sheet of foil, folding the edges together carefully to seal. Place in oven and bake approximately one hour, until beets are tender.

3) Meanwhile, puree the sunflower seeds in one cup of the broth until perfectly smooth and not at all gritty. This may take several minutes, just give your blender breaks as needed.

4) When cooked, add the vegetables from the foil pouch to the sunflower puree with all their juices. Puree until completely smooth, slowly adding the water and scraping the sides as needed. Add remaining salt and pepper to taste. Bon appetit!

Vegan Hot Dog Casserole

So this is a combo weird food/comfort food/food from your childhood post. Be forewarned, if you are a whole-foods, healthy-eating kind of person, this post may horrify you. When I was a kid, I distinctly recall having two meals for dinner; bacon and eggs, and hot dog hash. Hot dog hash was a one-dish meal with chopped hot dogs, friend potatoes, and frozen mixed veggies. Smother with ketchup and you’re good to go. I think it falls into the category of hot dog casseroles, which generally include a can of chili or beans and cheese baked on top, in addition to the hash browns and hot dogs. It usually doesn’t have any veg at all. Liberal use of ketchup is generally encouraged, though. In the 1980’s, feeding your children like this wasn’t considered tantamount to child abuse. No one would get nasty notes home because their leftovers in their thermos didn’t include enough grains. Ketchup was even classified as a serving of fruit or vegetable!

One beautiful bowl of childhood memories

One beautiful bowl of childhood memories

In this recreation, I used veggie dogs and tater tots as my base, cause anything deep fried twice is going to be delicious. You can also make your tots in the oven, though, just follow the package directions. I’m hoping someone out there who came from the era of casserole dinners gets a kick out of this.

Hot Dog Casserole

6 veggie dogs, cut into 1/2 inch slices
1/2 bag tater tots
1.5 cups frozen mixed vegetables
1/2 bag daiya shreds

1) Start by cooking your tater tots either in the deep fryer or in the oven. Preheat the oven to 350 even if you are deep frying your tots

2) As your tots are cooking, boil a small pot of water with your frozen mixed veg for about 3 minutes. At the last moment, add the hot dog slices, then drain.

3) Arrange tater tots, hot dogs and veggies in a baking dish. Top with daiya shreds and bake 5 minutes, til just melted. Bon appetite!

Maple Coconut Granola

Granola is a contentious food. Associated with crunchy hippies and health nuts, it gets a bad reputation for tasting like grass. It’s also tends to be hard to chew, full of hard chunks of ancient raisins and fibrous grains. Who has patience for hard-to-eat food in the morning? Because of all this, people tend to forget that granola can be so full of delicious things that it tastes more like a dessert than a breakfast food. If you don’t believe me, try the Coconut Yogurt Parfait at Resonance Cafe. Thick, creamy yogurt with sweet almond granola and fruit preserves. They include it in their breakfast menu, but I order it as desert- usually to share, because it’s so filling after a meal. Resonance is my favourite cafe in the city- all vegan, delicious and affordable food, plus they double as a jazz club at night. You’ll definitely be hearing more about it this month.

Mile End from above. Crooked 3-story brick buildings, big trees, and a short stroll to the mountain

Mile End from above. Crooked 3-story brick buildings, big trees, and a short stroll to the mountain

During the day, I work as a cook, primarily personal chefing for a small family in Mile End, Montreal. Mile End is a bit like Sesame Street, in that everyone knows everyone else and it’s perfectly reasonable to take a stroll down the street just to stop by local businesses and friend’s houses to say hi on your way home from work. Resonance is in Mile End too, as is Boulangerie Guillaume. Guillaume serves as the baker for many businesses in Mile End, providing bread for Resonance and several small restos in the area. The bakers have a small wooden delivery trike, and early in the morning you can see them peddling along the bike path, basket stacked with row on row of fresh, warm baguette. The sandwich bread at Resonance is provided by Guillaume, perfect squares of thick-cut white bread, perfect for grilling on the panini press. Many mornings, Work Dad will walk over to Guillaume to pick up some fresh bread to serve with coconut-macadamia butter and guava jam. Other days, a quick bowl of cereal is on the menu.

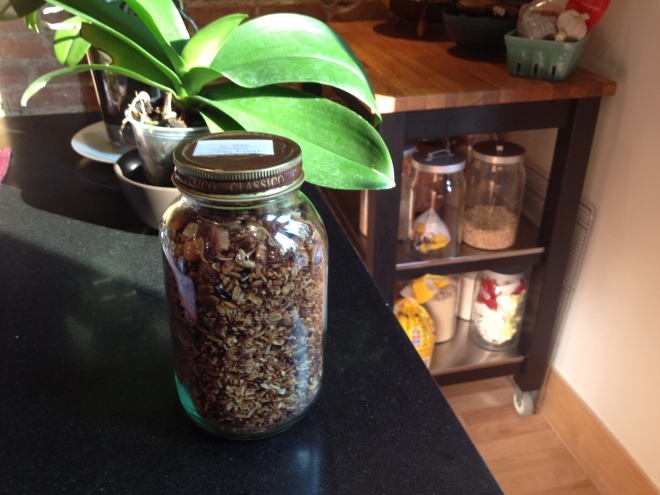
Mmmm granola

Mmmm granola

That is where this granola comes in. Playing to the exotic tastes of my work family, I wanted something with toasted coconut to serve as a quick breakfast to go with fresh mangoes. Brimming with coconut, walnuts and dried fruit, this granola fits the bill perfectly. Large flake oats provide the base and hemp hearts and flax provide added omega 3 fatty acids. I solve the problem of tough, dried-up fruit by presoaking them in hot water before baking. This keeps them much more soft, easier for little mouths to manage. This is the kind of breakfast that will hold you over til lunch. This makes about 8-10 cups of granola, so make it once and you’ll be set for a couple months. I keep a mason jar out for daily use and refill it from an airtight bag int he freezer as needed. Serve it with coconut or almond milk, or maybe coconut yogurt and passion fruit jam.

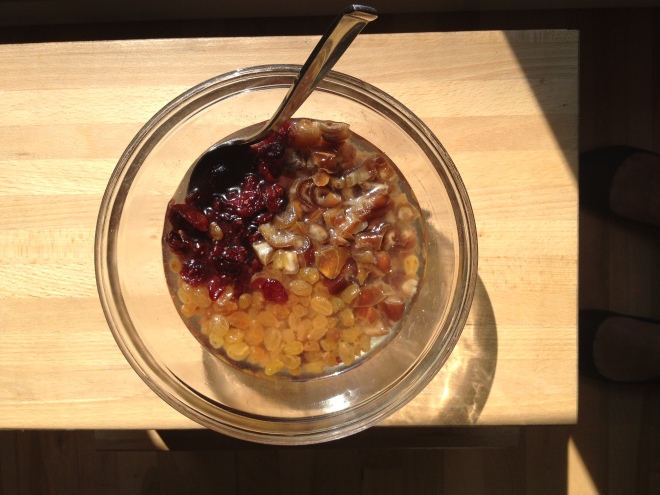
Soak your dried fruit

Soak your dried fruit

Maple Coconut Granola

3 cups large flake oats
1.5 cups medium shredded unsweetened coconut
1/2 cup hemp hearts
1/4 cup ground flax
1 cup chopped walnuts
1/2 cup pumpkin seeds
1/2 cup sunflower seeds
1/2 cup chopped dates
1/2 cup golden raisins
1/2 cup sweetened dried cranberries
1/2 cup coconut oil, melted
1/2 cup maple syrup
2 tsp cinnamon
1/2 tsp nutmeg

1) Put on a kettle to boil with a couple cups of water and preheat the oven to 350.

2) Once boiled, pour the hot water over the dried fruits in a small bowl and leave to soak.

3) Toast the pumpkin seeds, sunflower seeds and walnuts on a cookie sheet in the hot oven until just barely toasted, about 5 minutes.

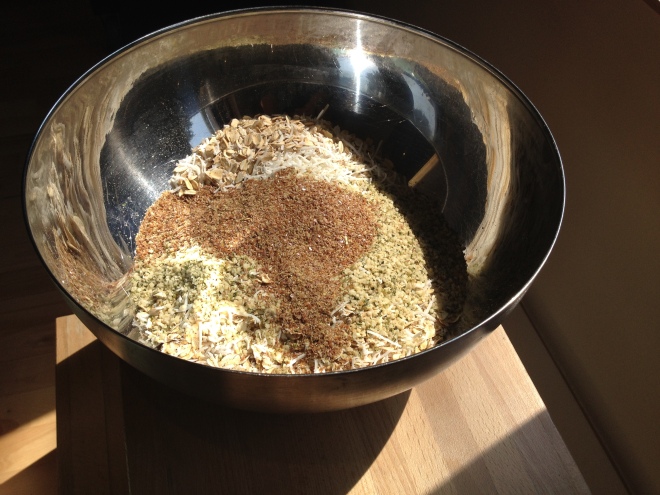
4) Stir the oats, coconut, hemp hearts and flax together with the cinnamon and nutmeg in a large bowl.

5) Drain the water off the dried fruit and add to the oatmeal mixture along with the toasted nuts and seeds and the maple syrup and coconut oil. Stir well.

6) Spread granola into two large baking pans. Bake in 10 minute intervals, taking the pans out to stir thoroughly between each interval, for 30-40 minutes, until golden. Cool and store in airtight containers in the freezer. Granola keeps in an airtight container on the shelf for 2 weeks.

Delicious grains

Delicious grains

Vegan Mofo 2015: La Vie Montrealaise!

Vegan MoFo 2015 has the cutest banner this year!

Vegan MoFo 2015 has the cutest banner this year!

It’s that time of year again! I am not officially registered, mostly because I spent the last two months helping my four siblings and mother move out of my nana’s house in Toronto, moving myself back into my newly renovated work kitchen, and camping in the woods for 10 days with a gazillion people. I will still post along with MoFo at my usual sporadic pace anyway, just with fewer readers to disappoint!

My theme this year is La Vie Montrealaise. Explore with me all the sweet things that make life in Montreal truly fascinating, beautiful, and heartily weird. I have lived here for 4 years now, and I have a hard time imagining living anywhere else ever again. Follow along with me this month and maybe you’ll see why I’m so smitten.

The verdant hidden terrace of Cafe Santropol captures the quintessential Montreal aesthetic. Combining tiny spaces and small, tightly packed tables with enough height and low light and detail to create intimacy. The perfect place for sipping iced tea and enjoying lunch with someone you want to (re-)connect with. Or some solo reading or journaling. Or maybe grabbing take-out on your way to Tam Tams at Park Mont Royal next door.

The verdant hidden terrace of Cafe Santropol captures the quintessential Montreal aesthetic. Combining tiny spaces and small, tightly packed tables with enough height and low light and detail to create intimacy. The perfect place for sipping iced tea and enjoying lunch with someone you want to (re-)connect with. Or some solo reading or journaling. Or maybe grabbing take-out on your way to Tam Tams at Park Mont Royal next door.

Easy Broiled Breakfast Sandwiches and the Best Tofu Ever

A breakfast sandwich is a beautiful thing. Portable, warm, savoury and nourishing, it’s the perfect way to start a cool autumn day. Of course, sometimes you go grocery shopping hungry and by the time you get home you’re considering eating tofu with Italian dressing to stave off the hangries. Breakfast sandwiches are food for then, too. I pulled these together in 10 minutes flat before unloading the groceries into the fridge. You can make the tofu filling at the beginning of the week, and have warm breakfast sandwiches all week long in the time it takes to toast and English muffin. How good does that sound?

The tofu marinade is deceptively simple. If you’ve never tried broiled tofu, I recommend you do. Almost all the omnis I know prefer their tofu broiled over any other method of preparation. In part, I think it’s because broiling allows the tofu to retain its shape and texture well. Also, I think it absorbs marinade best when cooked in this method, even if it hasn’t been soaking it in long. Broiled tofu is especially nice with a sweet marinade, such as maple-garlic-soy, as the sugars form a sticky coating and char just slightly. In this case, this perfectly savoury blend of nutritional yeast, garlic and tamari soaks into the tofu leaving a distinctly eggy impression, especially with the black salt added at the end. If you don’t like the taste of eggs, which are faintly sulphur-ish in aroma, omit the black salt. You can use this recipe for your rice bowls, sandwiches, vegan benedicts or snacking tofu.

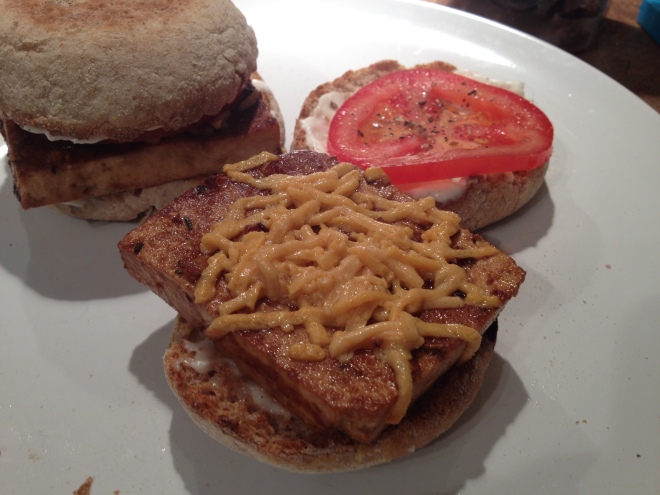
Dans ma bouche!

Dans ma bouche!

Easy Broiled Breakfast Sandwiches and the Best Tofu Ever

For the Tofu:
1 lb extra firm tofu- choose the most smooth-textured one you can find, avoid crumbly or spongey brands. You want something close to the texture of cooked eggwhite.
1.5 tbsp tamari
1 tbsp apple cider vinegar
1/2 cup strong stock (I used Better Than Bouillon Vegetable)
2 cloves minced garlic
1/2 tsp dried thyme leaves
2 tbsp olive oil or melted Earth Balance (I particularly like the EB with this- if you use hot stock, it will melt the EB)
2 tbsp nutritional yeast
Pepper, to taste
Black salt, sprinkled over to taste

For the Sandwiches:
Whole wheat English muffins
Daiya cheddar or your favourite alternative
Vegenaise or your favourite vegan mayo
Sliced tomato
Optional: sliced green onion, veggie bacon or zucchini/mushroom slices (broiled alongside the tofu), marmite, ketchup

Prepare tofu marinade. Preheat your broiler. Assuming your tofu is a rectangular prism, cut it in half to make two squares, and cut each square into 1/2-inch slices. Toss together marinade ingredients. Arrange tofu on a nonstick cookie sheet and coat in marinade thoroughly over both sides. Allow to sit as you prep your sandwich ingredients.

Broil tofu and prepare sandwich fillings. Slice your tomatoes, English muffins, and any other vegetables you’re using. Place tofu under the broiler for 2 minutes. All the marinade that was on the tops should be dry and absorbed by now- if not, your broiler may not be hot enough or your tofu may be too far away from it. Baste with marinade, then place back under the broiler for two more minutes, along with the English muffins so they can toast. Baste again, then add Daiya to the top of the tofu. Broil until just melted and the English muffins are toasty.

Assemble sandwiches. Spread mayo on the inside of both sides of the English muffins. Place tomato on one side, and tofu on the other, cheese up. Add any of the extra ingredients you may want, the black salt and the pepper to taste. Squish both sides together. Bon appetite!

New foster kittens! About 5 weeks old and full of snoozes.

New foster kittens! About 5 weeks old and full of snoozes.

Calalloo in Ginger-Lime Coconut Milk

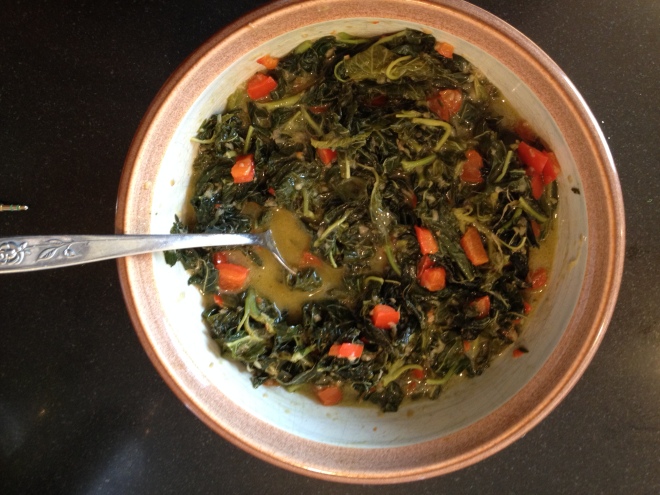
Doesn't look like much, but this dish is swimming in flavour

Doesn’t look like much, but this dish is swimming in flavour

This isn’t exactly a camping recipe. As in, I didn’t actually make it when I was camping. But I wanted to, since it’s so easy and a healthy departure from the usual camping fare. If you’ve never really had Jamaican food, you’re in for a treat. Full of interesting pairings, like thyme and ginger, scotch bonnets and coconut milk, it’s at the same time very familiar and comforting, and totally unlike anything you’ve had before. Much of the food is very simple to prepare, too. Full of steamed greens and mashed tubers, beans and rice, there’s so much a vegan can borrow from the Jamaican diet.

Calalloo is a big, leafy green, otherwise known as amaranth leaves. You can substitute full leaf spinach, but be sure to add it just at the very end of cooking, as spinach is more fragile than calalloo. To make this camping-friendly, pre-mince your ginger in the food processor at home and just bring along a jar to add to recipes- this is what I do with the garlic, too. Also, you can substitute real Jamaican scotch bonnet hot sauce instead of using your own peppers. Unless you are very experienced with the dangers of using very hot peppers, I really do recommend sticking to a bottled sauce. Serve this alongside some simple rice with kidney beans or perhaps some mashed sweet potato. Add a tall glass of ginger beer and you’re set!

Calalloo in Ginger-Lime Coconut Milk

2 tbsp coconut oil
1 large bunch calalloo, about 2 lbs, ripped from stems and roughly chopped
1 sweet red bell pepper, chopped
1/2 of 1 seeded scotch bonnet, or scotch bonnet sauce, 1 tbsp (start with less and add to taste- be careful! It’s hot)
3 garlic cloves, minced (1 tbsp)
4-inch knob of ginger, minced (3 tbsp)
1 small bunch thyme stems, tied into a bundle (or 1 tsp dried thyme leaves)
1 can coconut milk
1 tbsp brown sugar
1 lime, juiced

1) Saute the pepper(s), garlic and ginger in the oil briefly to release flavours, about 1 minute

2) Add remaining ingredients, stir and cover about 5 minutes

3) Remove cover and cook longer if the greens aren’t fully softened. Calaloo does well with a good simmer, do don’t be afraid of over-cooking it. 

And now, gratuitous kitty picture! These guys are available for adoption!

Just look at those fluffy faces!

Just look at those fluffy faces!

Campfire Soup

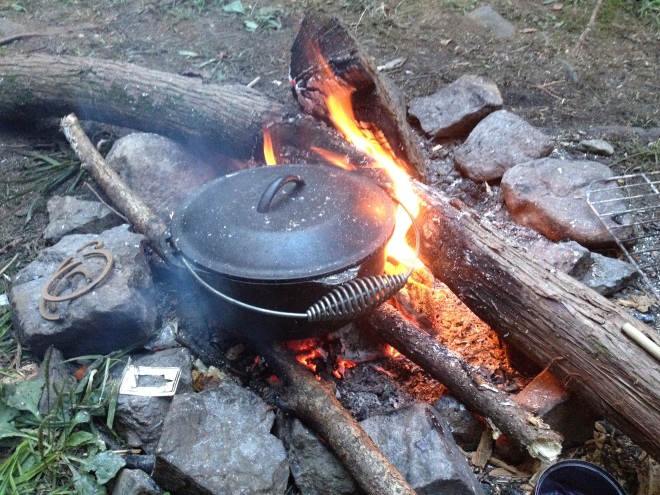
Soup, boiling away happily

Too hungry to chop wood, just burn the log whole. Soup, boiling away happily.

Everything tastes better when you eat it outdoors. This is the simple truth captured in grill and patio furniture ads everywhere. Take a meal that would be way easier, more convenient, and likely more comfortable to prepare and consume indoors, relocate the whole shebang outdoors instead, and voila! You have a party. This is what you buy into when you go on a picnic, and when you purchase your Sims that 300, 000 Simoleon gazebo they’ve been eyeing. Eating outdoors makes food taste better. We believe it’s true, and so it is.  

This applies to camping, too. Except when you’re camping there are several, slightly less twee reasons for your appreciation for food. For one, you’re probably starving. Camping is a lot of work. Setting up tents, scrounging for kindling, chopping firewood, finding places to pee, getting in and out of layers constantly to keep warm enough without sweating (otherwise you’ll be cold at night). When you’re working hard without really realizing it (because you’re having so much fun!) you build up an appetite. Anything you cook will automatically taste better. All that fresh air helps too, as the more you are exposed to the elements, the more of your body’s resources are used up- you get thirsty and hungry faster outside. Lastly, you’re probably so busy that you’ve only started cooking when you’re hungry, not accounting for the extra time that fire building takes. As such, you’re only getting around to eating way past the point of being merely hungry, well into the murky and dangerous realm of being truly hangry

Then you add bad weather to the mix and things all get much, much worse. Building a fire in the rain is hard. Keeping a fire going in the rain long enough to boil a pot of water is extra hard, and sometimes impossible. Being wet and cold and hangry is a dangerous combination that I suggest you avoid under any circumstance, but which is nonetheless sometimes unavoidable in camping situations. When I was a Scout leader, in times like these, we’d pull out the Lipton’s Chicken Noodle Soup. Powdered chicken bouillon with extra salt added, flecks of dehydrated parsley, a distinct flavour of celery and small, quick-cooking wheat noodles. This salty, satisfying broth whipped up in five minutes flat, and, when smothered in saltines, was like mana from heaven for depleted, defeated campers. It wasn’t particularly nourishing, but when you’re camping, cold and hangry, it tastes like the most delicious thing you’ve ever put in your mouth. 

In coming up with this campfire soup, I was going for that same warm-you-to-the-bones, nourishing, wonderfully salty and savoury feeling. So, I started with my favourite salty, MSG-ridden seasoning, Vegeta. Go ahead and use something healthy if you must, but what you’re really going for here is a strong, salty chicken-style broth with flecks of parsley. I added a few real vegetables, small tofu cubes, and soup noodles, because I wanted it actually nourishing- not just tricking my body into thinking it was getting something worthwhile. Lastly, my new favourite addition to any brothy soup- matzoh. Matzoh holds it’s form in broth in a way that is satisfyingly chewy, almost like a noodle, and a far cry from the spongy, semi-dissolved mass that results from saltines left soaking too long. Without further ado, here is the recipe! It absolutely does not need to be made in cast iron, over a campfire, or eaten outdoors- but I promise you it won’t taste nearly as good otherwise.

Boil faster, darn it!

Boil faster, darn it!

Campfire Soup

1 block firm tofu, cut into 1cm/ 1/2 inch dice
1 large yellow onion, cut into large 1 inch dice
3 medium carrots, peeled and cut into 3 mm thick rounds
2 stalks of celery, cut into 3 mm thick slices
2 minced cloves garlic
1/2 package of soup noodles
Vegeta or bouillon of choice, added to taste
3 tbsp Earth Balance, or margarine of choice
pepper
matzoh

1) Over a steady fire, heat your 8 quart cast iron Dutch oven

2) Saute your onion in the margarine until just starting to turn golden. Add the remaining vegetables and saute until just beginning to soften, stirring occasionally

3) Fill the pot to 2 inches below the rim, put on the lid and bring to a boil

4) When boiling, add soup noodles, tofu and broth powder, starting with about half of what you think you’ll need

5) When noodles are cooked, adjust seasoning and add pepper.

6) Serve steaming mugfuls with broken matzoh to grateful campers